Recipe: Roman-inspired fava beans are good as side dish or on crostini
 |
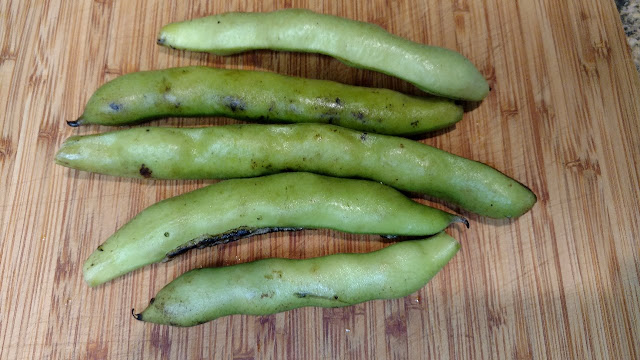
| Late-season fava bean pods are long and fat. (Photos: Debbie Arrington) |
Our mild (and wet) spring elongated the season of one cool-weather favorite: Fava beans.
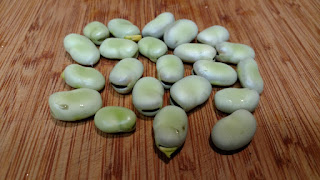
I’m still picking favas and I know I’m not alone. By late season, favas produce huge pods, 6 to 8 inches long and fat as thumbs. As big as they are, these pods contain only four or five beans. It usually takes 2 pounds of pods (or more) to produce 2 cups of beans.
Favas rank among the most time-consuming beans to prepare. First they must be shelled. Then, the individual beans should be skinned, especially when fully mature. (The skin has a bitter aftertaste.)
 |
| Those big pods yield this many beans. They still need to be skinned. |
But the result – the naked, emerald-green inner bean -- melts in your mouth.
To remove the skins, use this method: Bring a large pot of lightly salted water to a boil. Plunge shelled beans into the boiling water. Boil for 2 to 3 minutes.
Remove the beans from the boiling water and plunge them into a bowl of cold water. Wait a few minutes, then peel the beans. Use your thumbnail or a paring knife to nick the bean’s skin, then the skin will slip right off.
Even with this trick, expect it to take 20 minutes or more to peel 2 cups. Is it worth the effort? If you love favas, yes!
This is my favorite way to cook fava beans. Besides serving as a side dish, it also doubles as fava spread for crostini.
The romaine lettuce blends with the bright green of the beans and provides some extra moisture as the vegetables cook. If substituting scallions, use the green parts, too; it just intensifies the green.
To be truly Roman-style fava beans, add ½ cup chopped prosciutto with the beans. Otherwise, consider these favas Roman-inspired.
 |
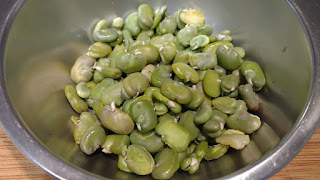
| These are shelled, skinned and ready to cook. |
Roman-inspired fava beans
Makes 4 side-dish servings
Ingredients:
 |
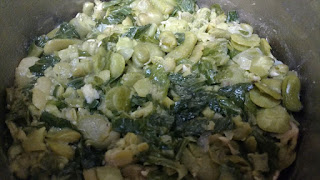
| Ready to serve. |
Comments
0 comments have been posted.Sacramento Digs Gardening to your inbox.
Food in My Back Yard Series
April 1: Don't be fooled by these garden myths
March 25: Fertilizer tips: How to 'feed' your vegetables for healthy growth
March 18: Time to give vegetable seedlings some more space
March 11: Ways to win the fight against weeds
March 4: Potatoes from the garden
Feb. 25: Plant a fruit tree now -- for later
Feb. 18: How to squeeze more food into less space
Feb. 11: When to plant? Consider staggering your transplants
Feb. 4: Starting in seed starting
Sites We Like
Garden Checklist for week of March 30
Your garden doesn’t mind April showers. Get busy now to enjoy those future flowers.
* Get ready to swing into action in the vegetable garden. As nights warm up over 50 degrees, start setting out tomato, pepper and eggplant transplants.
* From seed, plant beans, beets, cantaloupes, carrots, corn, cucumbers, melons, pumpkins, radishes and squash. (Soak beet seeds overnight in water for better germination,)
* Plant onion sets.
* In the flower garden, plant seeds for asters, cosmos, celosia, marigolds, salvia, sunflowers and zinnias.
* Transplant petunias, zinnias, geraniums and other summer bloomers.
* Plant perennials and dahlia tubers for summer bloom.
* Transplant lettuce and cabbage seedlings.
* April is the last chance to plant citrus trees such as dwarf orange, lemon and kumquat. These trees also look good in landscaping and provide fresh fruit in winter.
* Smell orange blossoms? Feed citrus trees with a low dose of balanced fertilizer (such as 10-10-10) during bloom to help set fruit. Keep an eye out for ants.
* Apply slow-release fertilizer to the lawn.