Recipe: No-waste method lets you customize a kitchen staple
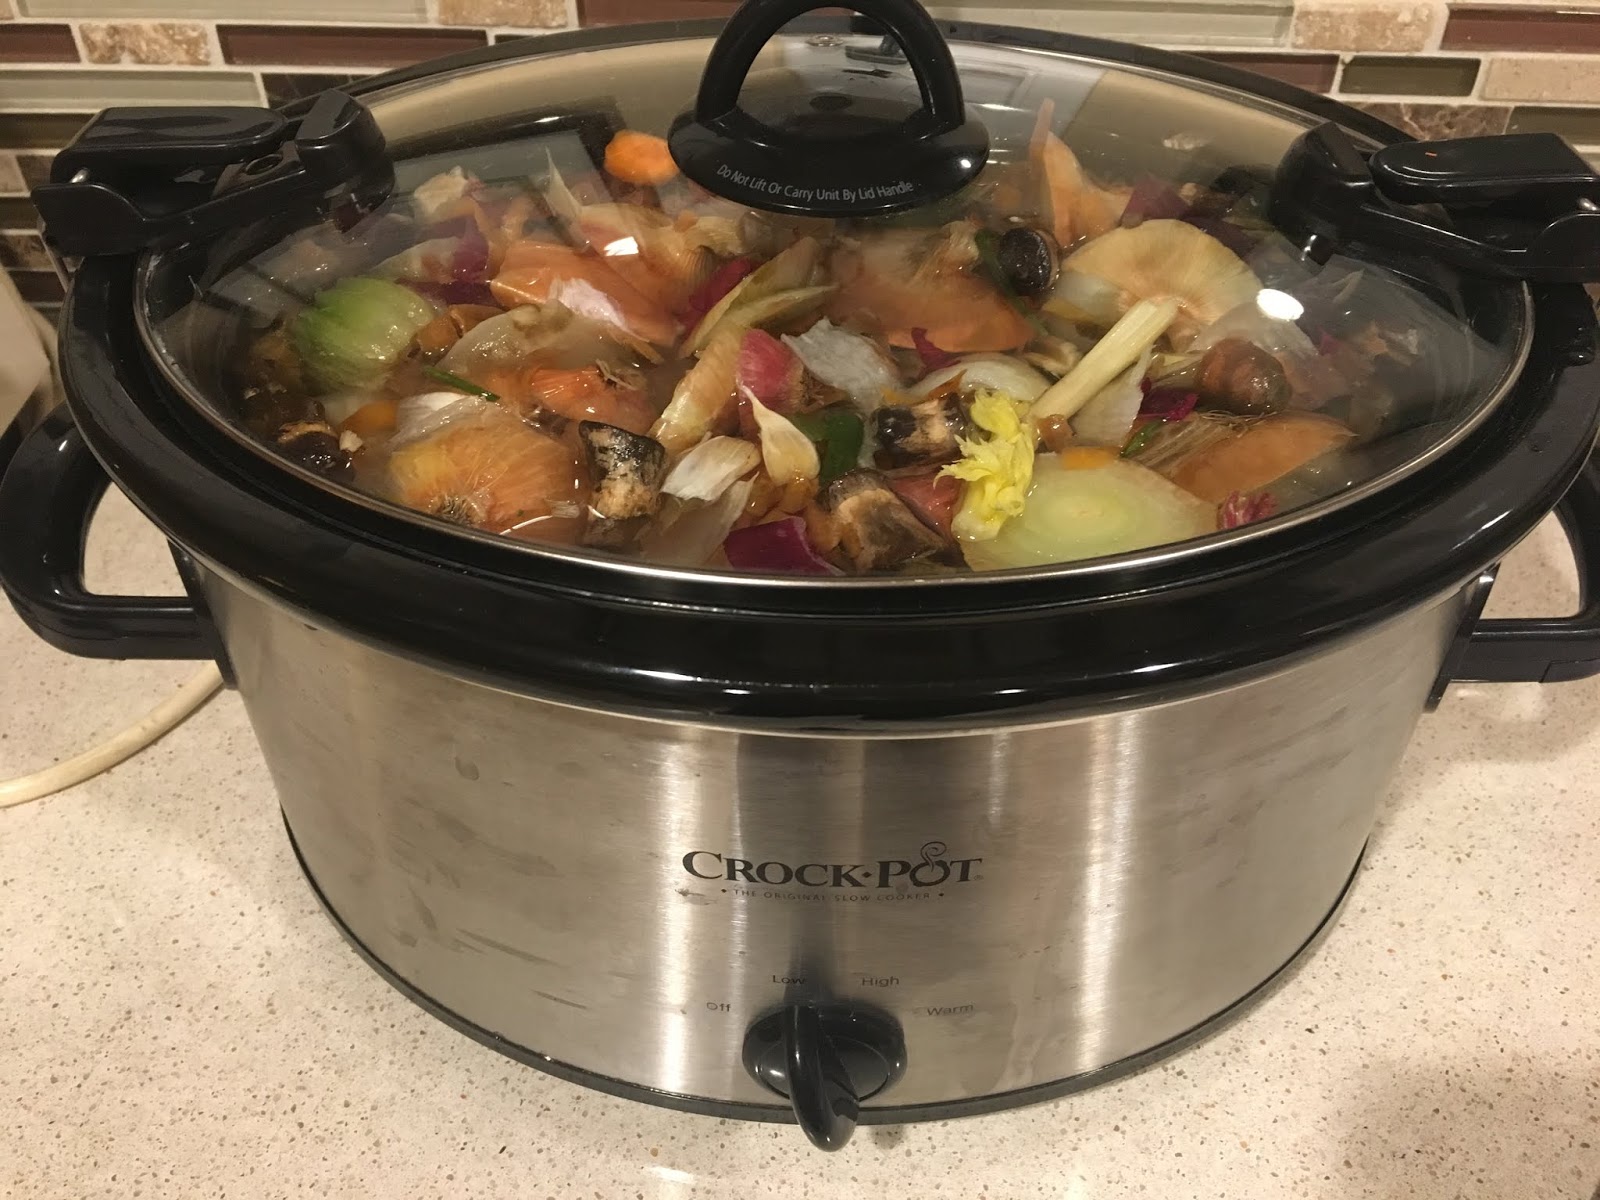 |
| Great broth in the making: Veggie scraps, water and heat. (Photos: Kathy Morrison) |
It’s finally the time of year when I don’t mind heating up the kitchen to make soup, stew or risotto.
I like chicken broth just fine, but prefer to use vegetable stock or broth for these type of dishes. The handy aseptic packages in the grocery store hide a lot of information, however. Is this kind tomato-y or more oniony? How earthy is that broth that has mushrooms listed in the ingredients?
The easy answer to this (no surprise) is to make your own. The recipe below is more method than prescription, as you’ll see.
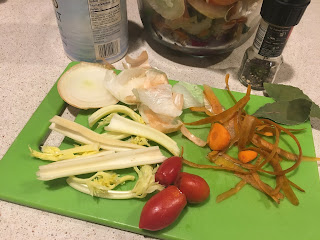
Since we’re all gardeners or aspiring gardeners here, I’m going to assume you’re already composting your kitchen scraps. Many of those scraps can be used to flavor vegetable broth for several dishes -- and they still can be composted afterwards.
The trick is to use your freezer, and to assess every vegetable bit before it hits the compost bin. Onion tops? Yes. Dried-out garlic cloves? Yes again. Carrot peelings? Absolutely. Other favorites in my house include mushroom stems, celery leaves and ends, limp tomatoes and wilted spinach. I keep them in a gallon freezer bag and add to it over the course of several weeks. Sometimes I have two bags going, for different ingredients.
|
Comments
0 comments have been posted.Sacramento Digs Gardening to your inbox.
Flowers in My Back Yard Series
July 7: Grow these bright cosmos for bees and butterflies
June 30: Agapanthus adds blue fireworks to the garden
June 23: Easy-care gazanias fill those hot corners
June 16: Daylilies are perfect for water-wise gardens (and a lot more)
June 9: Grow coneflowers for pollinators -- and yourself
June 2: Sunflowers capture Sacramento's summer attitude
May 29: Are your roses going 'blind'?
May 26: Zinnias are the summer flowers every garden needs
May 19: Plant dahlias now for late-summer flower power
May 12: Know your coreopsis from your bidens
May 5: Mums the word on Mother's Day weekend
April 28: Majestic Matilija poppy is worth a look
April 21: Celebrate roses, America's favorite flower
April 14: Small flowers with outsized impact
April 7: Calendulas do double duty
April 3: Make Easter lilies last for years to come
March 31: In praise of a pollinator magnet (small-leaf salvias)
March 24: Azaleas brighten shady spots
March 17: The perfect flower for beginners? Try zonal geraniums
March 10: Keep camellias happy for years to come
March 3: Fruit tree blossoms are a fleeting joy
Feb. 27: Are your roses looking rusty?
Feb. 24: Treasure spring daffodils now and for years to come
Feb. 17: How and why to grow wildflowers
Feb. 10: Let's talk Valentine's Day roses
Feb. 3: Why grow flowers?
Local News

Sites We Like
Garden checklist for week of July 12
Get out early in the morning to take care of garden chores. Temperatures are expected to stay below 80 degrees before 10 a.m.
* Remember to water early and deep; your garden depends on you.
* It’s not too late to add a splash of color. Plant petunias, snapdragons, zinnias and marigolds.
* From seed, plant corn, pumpkins, radishes, winter squash and sunflowers.
* Keep your vegetable garden watered, mulched and weeded. Water before 8 a.m. to reduce the chance of fungal infection and to conserve moisture.
* Water before fertilizing vegetables and blooming annuals, perennials and shrubs to give them a boost. Feeding flowering plants every other week will extend their bloom.
* Feed vegetable plants bone meal or other fertilizers high in phosphate to stimulate more blooms and fruiting.
* Don’t let tomatoes wilt or dry out completely. Give tomatoes a deep watering two to three times a week. Harvest vegetables promptly to encourage plants to produce more. Squash especially tends to grow rapidly in hot weather. Keep an eye on zucchini.
* If your melons and squash aren’t setting fruit, give the bees a hand. With a small, soft paintbrush, gather some pollen from male flowers, then brush it inside the female flowers, which have a tiny swelling at the base of their petals. (That's the embryo melon or squash.) Within days, that little swelling should start growing.
* Pinch back chrysanthemums for bushy plants and more flowers in September.
* Remove spent flowers from roses, daylilies and other bloomers as they finish flowering.
* Pinch off blooms from basil so the plant will grow more leaves.
* Cut back lavender after flowering to promote a second bloom.
Contact Us
Send us a gardening question, a post suggestion or information about an upcoming event. sacdigsgardening@gmail.com
Food in My Back Yard (FIMBY) Series
Lessons learned during a year of edible gardening
WINTER
Is edible gardening possible indoors?
Hints for choosing tomato seeds
Why winter is the perfect time to plant fruit trees
When to plant? Consider staggering your transplants
How to squeeze more food into less space
Plant a fruit tree now -- for later
Win the weed war by tackling them in winter
Tips for planting bare-root trees, shrubs and vegetables
Time to give vegetable seedlings some more space
Ways to win the fight against weeds
FALL
Dec. 16: Add asparagus to your edible garden
Dec. 9: Soggy soil and what to do about it
Dec. 2: Plant artichokes now; enjoy for years to come
Nov. 25: It's late November, and your peach tree needs spraying
Nov. 18: What to do with all those fallen leaves?
Nov. 11: Prepare now for colder weather in the edible garden
Nov. 4: Plant a pea patch for you and your garden
Oct. 27: As citrus season begins, advice for backyard growers
Oct. 20: Change is in the autumn air
Oct. 13: We don't talk (enough) about beets
Oct. 6: Fava beans do double duty
Sept. 30: Seeds or transplants for cool-season veggies?
Sept. 23: How to prolong the fall tomato harvest
SUMMER
Sept. 16: Time to shut it down?
Sept. 9: How to get the most out of your pumpkin patch
Sept. 2: Summer-to-fall transition time for evaluation, planning
Aug. 26: To pick or not to pick those tomatoes?
Aug. 19: Put worms to work for you
Aug. 12: Grow food while saving water
Aug. 5: Enhance your food with edible flowers
July 29: Why won't my tomatoes turn red?
July 22: A squash plant has mosaic virus, and it's not pretty
July 15: Does this plant need water?
July 8: Tear out that sad plant or baby it? Midsummer decisions
July 1: How to grow summer salad greens
June 24: Weird stuff that's perfectly normal
SPRING
June 17: Help pollinators help your garden
June 10: Battling early-season tomato pests
June 3: Make your own compost
May 27: Where are the bees when you need them?
May 20: How to help tomatoes thrive on hot days
May 13: Your plants can tell you more than any calendar can
May 6: Maintain soil moisture with mulch for garden success
April 29: What's (already) wrong with my tomato plants?
April 22: Should you stock up on fertilizer? (Yes!)
April 15: Grow culinary herbs in containers
April 8: When to plant summer vegetables
April 1: Don't be fooled by these garden myths
March 25: Fertilizer tips: How to 'feed' your vegetables for healthy growth
 Powered by California Local


