Now's the best time for soil solarization

|
|
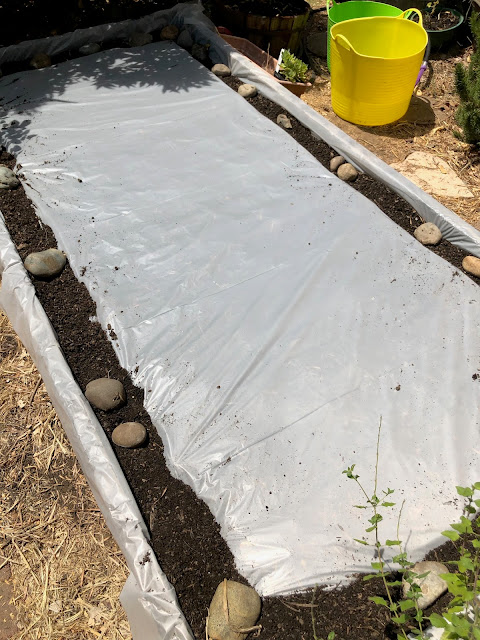
Here's my raised bed, all ready for the sun to do its work.
(Photos: Kathy Morrison) |
There's at least one good thing about our hot, no-rain summers: We can easily put the sun to work for us in the garden, solarizing our soil.
Why solarize? It's a natural way to control pests, pathogens and weeds.
My first 4-by-8-foot raised bed was built 20 years ago on the south side of our small backyard. This replacement bed, constructed with better lumber, is 18 or 19 years old. It was my tomato-growing workhorse site for a few years, until I joined my local community garden and moved tomato production there.
Since then the raised bed has had an erratic production history. Beans did well for awhile, and peppers two years. Onions went in at least one year. I most recently had strawberry plants there, but they were not happy and died more often than not. The survivors were moved to grow bags, where they are doing well.
Since I didn't have to plant anything in the home raised bed this year, I decided to try solarizing it to kill off any lingering pathogens (such as wilts), weed seeds or nematodes. We had an overgrown podocarpus tree nearby removed earlier this year, clearing the way for an intense solarization experience.

|
|
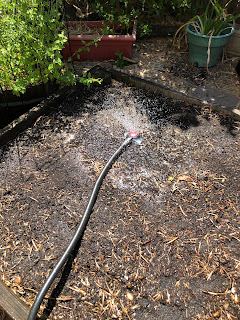
The soil needs to be soaked first for
solarization to work. Those remaining
podocarpus leaves also have to go. |
-- Remove any debris from the site and rake it flat.
-- Water it well, down at least 12 inches.
-- Dig trenches along the edges where the plastic will be anchored.
-- Cover tightly with plastic; anchor the plastic with soil (and rocks, in my case).
-- Wait four to six weeks (or more) for the sun to do its work.
-- Uncover and plant. (Though I likely will do a soil test before I put any plants in.)
The plastic sheet I used is 1.5 mils thick, which is within the recommended range for durability. It's not perfectly clear, but clear enough. Black or colored plastic is not recommended. Rolls of clear plastic can be found at most home improvement stores -- look in the paint section.
My raised bed's been set up for a week now. The soil temperature's already up to 98 degrees and the underside of the plastic shows many nice bubbles.
I'll report back later in the summer on my progress. Meanwhile, here's a great guide to solarization from the UC Integrated Pest Management program, if you want to try it. If a video is more useful to you, the Sacramento master gardeners filmed a solarization guide for the 2020 Virtual Harvest Day; see it here .
Comments
0 comments have been posted.Sacramento Digs Gardening to your inbox.
Sites We Like
Garden Checklist for week of July 21
Your garden needs you!
* Keep your vegetable garden watered, mulched and weeded. Water before 8 a.m. to reduce the chance of fungal infection and to conserve moisture.
* Feed vegetable plants bone meal, rock phosphate or other fertilizers high in phosphate to stimulate more blooms and fruiting. (But wait until daily high temperatures drop out of the 100s.)
* Don’t let tomatoes wilt or dry out completely. Give tomatoes a deep watering two to three times a week.
* Harvest vegetables promptly to encourage plants to produce more. Squash especially tends to grow rapidly in hot weather. Keep an eye on zucchini.
* Pinch back chrysanthemums for bushy plants and more flowers in September.
* Remove spent flowers from roses, daylilies and other bloomers as they finish flowering.
* Pinch off blooms from basil so the plant will grow more leaves.
* Cut back lavender after flowering to promote a second bloom.
* It's not too late to add a splash of color. Plant petunias, snapdragons, zinnias and marigolds.
* From seed, plant corn, pumpkins, radishes, winter squash and sunflowers.